
Earlier in the year, I was on the hunt for a simple and complete guide to get better acquainted with Laravel in a Dockerised environment. Thankfully, I came across an amazing guide published by Shane Osbourne way back at the start of 2017. I read this guide and loved every moment — however, I soon realised things have changed since then and that there was some missing pieces for a complete development build guide.
I’m hoping to shed some more light on what Laravel development looks like in a Dockerised environment and show you how to incorporate some extra utility containers to round off your local development.
Reviewing the Alternatives
Before I get started, it’s good to acknowledge that there are out of the box options. At the end of 2020, Taylor Otwell released a package by the name of Laravel Sail that helps you get right into development without having to do any configuring of Docker.
This is honestly a great tool and definitely one you want to check out. If you’re looking to get up and running fast or just need a default docker environment without understanding the underlying configuration, Sail is what you want. You can find the documentation here.
Note: If you do want to use Laravel Sail, you’ll need to make sure you have a Laravel 8+ project and if you’re on Windows you’ll have to use WSL 2.
So, what are we building?
We’re going to create a Docker environment that will allow you to easily swap out your versions, and require you to only have Docker installed locally. None of those nasty symlink issues with your PHP or MySQL versions.
Here’s a list of the services we’ll be creating in our Docker environment —
- PHP-FPM Process Manager (Application layer — PHP 7 or PHP 8+)
- Nginx (Web layer) — Refer to the end of the article for Apache
- MySQL (Database layer)
- Mailhog (Mailing layer)
- PhpMyAdmin (Database management)
All of the files we create in this guide will be re-usable across operating systems, with no dependencies besides Docker, as well as not being Laravel version specific. It’ll give you the flexibility to mix and match your services as you see fit.
So, if you want to use Laravel 6, 7 or 8+, with PHP 7.2 or 8+, all you have to do is change a line or two and you’re set.
Let’s get started.
¶ Step 1 — Download & Install Docker
Begin by downloading and installing Docker. You’ll likely find you use a mix of the desktop client, and the CLI but you can use either.
Download here & install
¶ Step 2 — Fetch Laravel
You can use a curl request to fetch a recent version or git clone for the latest release of Laravel. Alternatively, if you’ve got an existing project you can skip this step entirely. Either of these commands will need to be ran in your terminal/shell.
Download Laravel using curl
MacOS/Linux —
curl -L https://github.com/laravel/laravel/archive/v8.5.21.tar.gz | tar xz
Windows PowerShell—
curl.exe -LJO https://github.com/laravel/laravel/archive/v8.5.21.tar.gz tar -xf laravel-8.5.21.tar.gz
This will download and extract Laravel 8.5.21 — resulting in a laravel-8.5.21 directory wherever the command (or commands) is ran . Go ahead and rename this directory to whatever you prefer — you can run mv laravel-8.5.21 my-project in your console/shell to achieve this.
Download Laravel using Git
git clone https://github.com/laravel/laravel.git
This will clone the latest Laravel release to a directory named laravel. You’re welcome to rename this as you see fit, same as above.
¶ Step 3 — Installing application dependencies
By far the coolest trick that I learnt from Shaun’s guide was using the composer image directly to install application dependencies and then dispose of the composer container, with a single command.
To install your dependencies run the following in your project directory all you need is this one liner —
docker run --rm -v “$(pwd)”:/app composer install
or on Windows —
docker run --rm -v ${pwd}:/app composer install
The command is using an official composer image to build a container and then run the composer install command to install your application dependencies, before disposing of itself — all without you ever having to install composer.
Peak. Docker. Achieved.
¶ Step 4 — Creating a docker-compose file
Moving on, we’re now looking at Compose. What‘s Compose?
“Compose is a tool for defining and running multi-container Docker applications. With Compose, you use a YAML file to configure your application’s services. Then, with a single command, you create and start all the services from your configuration.”
That’s a very short summary of Compose — it definitely doesn’t do Compose justice on its own. If you want to read more, you can click here. Compose is a built in Docker tool, so you don’t need to worry about downloading it.
To make use of Compose we want to create a docker-compose.yaml file inside our project directory. Start by navigating into the project directory via your terminal/shell and then create a docker-compose.yaml file using any of the following commands—
MacOS/Linux —
touch docker-compose.yaml
Windows PowerShell —
fsutil file createnew docker-compose.yaml 0
Savages — Right click, new file.
Once you’ve created your docker.compose.yaml file, you’ll need to add your services to the file.
¶ Services
A service represents an instance or instances of an image — e.g. a web server, or a database server.
To begin with, your compose file should look as follows…
version: ‘3.8’
services:
  ... services go here
The version: ‘3.8’ is a reference to the compose version we’re using. The main difference between version 2 & 3 is that 3 is Swarm compatible, so we wont have to make any changes if we decide we want to use the Docker Swarm orchestrator down the line.
Starting from the very top, we’ll need to create several components to complete our docker setup.
Required Services
- PHP-FPM Process Manager (Application layer)
- Nginx (Web layer) — Refer to my resources for Apache
- MySQL (Database layer)
We’ll be using Nginx throughout this guide, however, I also find myself using Apache in my day to day and wanted to make this as complete as possible. So, if you are wanting to use Apache specifically, refer to my gists at the end of this guide. I’ve added complete gists with notes on how to get setup with Apache — it’s quite simple.
Optional Services
- Mailhog (Mailing layer)
- PhpMyAdmin (Database management)
These are only optional because you can run an application without them. But I want to stress that they will make your life a lot easier and round out your development experience saving you time in the long run. I use this these on the daily.
¶ PHP-FPM Process Manager
This will be our application layer. Unlike Apache, Nginx has to use PHP-FPM as a seperate process to handle our application code/PHP client requests. Apache is able to use the mod_php module. Once I dive into the Dockerfiles, this will make more sense.
Starting with our app service…
version: '3.8'
services:
    app:
        build:
            context: ./
            dockerfile: app.dockerfile
        working_dir: /var/www
        volumes:
            - ./:/var/www
        depends_on:
            - "database"
Breakdown
- build — Where we define the dockerfile we’ll be using and the context (or location) for which that file exists.
- working_dir — The working directory of the container
- volumes —What we’re mounting to the container. That is, the files or directory which we want to bind to our application container. In this case, we’re saying we want to mount the directory that our docker-compose.yaml resides in to the containers /var/www directory. This will also be the directory we’ll have our web server expect to find our application in.
- depends_on — This defines a dependency on another service to be in a running state before this service is built. In this instance, we want to be sure our database container is running before our application starts. Though it’s more than likely the database will start prior to our application, we want to be sure it is started. If say a migration were to run, we might have problems if our database server wasn’t prepared.
¶ Apache/Nginx
This will be our web layer. If you’re wanting to use Apache, you’ll follow a slightly different path — you’re probably best served jumping to my resources once you’ve read through with Nginx. For now, that doesn’t matter.
Our web service will look as follows…
web:
    build:
        context: ./
        dockerfile: web.dockerfile
    working_dir: /var/www
    volumes:
        - ./:/var/www
    ports:
        - 80:80
Breakdown
Much like before…
- build — We’re telling Compose we have a docker file dubbed
web.dockerfilethat lives in the current directory (context is ./). - working_dir — Our containers working directory is the
/var/wwwdirectory. - volumes —Mount the project directory contents to the containers
/var/wwwdirectory.
Something new:
- ports — This defines which ports our container is exposing externally and where those ports map to internally, within the container. So, what you’re getting is this — {external-port}:{internal-port}. Port 80 here is the most commonly used port for HTTP communication, so that’s what we’re using and that’s what’s expected.
¶ MySQL
This is our database layer. Unlike before, we’ll be using one of DockerHub’s official images. These come pre-configured and are supported by the community using best practices. Here’s what that looks like…
database:
    image: mysql:8.0.25
    volumes:
        - dbdata:/var/lib/mysql
    environment:
        MYSQL_DATABASE: ${DB_DATABASE}
        MYSQL_ROOT_PASSWORD: ${DB_PASSWORD}
        MYSQL_PASSWORD: ${DB_PASSWORD}
        MYSQL_USER: ${DB_USERNAME}
    ports:
        - 33061:3306
volumes:
    dbdata:
Breakdown
- image —
mysql:8.0.25is a pre-built image. Unlike before where we specified a Dockerfile to build the image, we can use one of DockerHubs official images. These are built using best practices, minimising dependencies and are actively maintained. Some images also include tags that let you specify the underlying operating system. In this case we only want the latest version of MySql 8. - volumes —
dbdata:/var/lib/mysqlis what’s known as a named volume. This is a volume we can use to persist our database data across our docker instance. So if we stop our services and later start them, we’ll be able to continue where we left off with the database in it’s previous state. - environment — These are key value pairs that become environment variables within your container. The ones we’ve specified here are required arguments for our MySQL image. One thing to point out, is we’re using a set of aliases for our values, namely:
${DB_DATABASE},${DB_PASSWORD}and${DB_USERNAME}. What Compose does with these alias is, it looks for a .env file in the context directory (which is our project directory here), and reads in the values of the aliases. Our Laravel project comes with an .env.example file that we’ll eventually copy over to a .env file. The project .env file, which serves as our projects configuration for defining its environment, will also serve as a reference for our docker-compose.yaml file. The result is, we don’t have to maintain these variables outside of our .env file. - ports — Once again, we define the ports of our container. Here we’re mapping the external port 33601 to the internal port 3306. This is where our SQL server will be listening for requests.
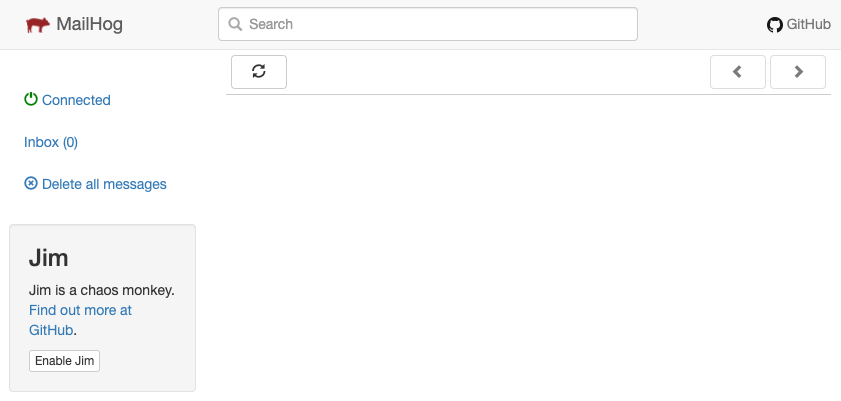
¶ Mailhog — Development Mailing Server (Optional)
This is our mailing layer. In a development environment, you may or may not have access to an existing SMTP server. If you don’t, Mailhog is a great way to check that your mailing is working as you’d expect while also avoiding you filling up a test inbox.
Using Mailhog doesn’t substitute testing your mailing in a non-development environment — it’s a handy tool to get you up and running without the additional setup but wont save you from EDM hell...
mailhog:
    image: mailhog/mailhog:latest
    logging:
        driver: 'none'
    ports:
        - 1025:1025
        - 8025:8025
Breakdown
- image —
mailhog/mailhog:latestis also a pre-built image. This is not an official image, but it is supported by the Mailhog team, so you’re in good hands. Only difference to note here is that, unlike the official image where you’re able to only specify the image repository like so {repository}:{tag}. Here we have to specify the user as well, {user}/{repository}:{tag}. The same goes for any other non official images. - logging — By default Mailhog stores logs. These aren’t useful to us, so we’ll set the driver to none.
- ports — Here we define two sets of ports. One for the web-based user-interface we’ll use to check our mail/inbox, and the other to connect to the mailing server.
¶ PhpMyAdmin — Database Management (Optional)
This will give us a nice user-interface to manage our database and check changes without having to access it via terminal/shell. I prefer to work with an GUI for my database in development, it’s just easier. and saves me time.
pma:
    image: phpmyadmin:5.1
    environment:
        - PMA_ARBITRARY=1
        - PMA_HOST=${DB_HOST}
        - PMA_USER=${DB_USERNAME}
        - PMA_PASSWORD=${DB_PASSWORD}
        - PMA_PORT=${DB_PORT}
    depends_on:
        - database
    ports:
        - 8888:80
Breakdown
- image —
phpmyadmin:5.1is another pre-configured official image - environment — As we saw earlier, some images require environment variables, as is also the case here. By specifying our variables like so ${key}, we’re letting Compose know to check our .env file for the specified keys value. Naturally with any Laravel project, our .env will contain all of the above. This will also allow us to automatically connect to our database via PhpMyAdmin without having to specify auth and database details each time we route to the login page.
- depends_on — We want to wait for the database to be in a running state before our GUI spins up, else there’s no real point in it — hence the database dependency.
- ports — We’re using port 8888 to connect to our web interface and we want to map this to our server listening on port 80.
¶ What your docker-compose.yaml should look like
docker-compose.yaml
version: '3.8'
services:

    # Application
    app:
        build:
            context: .
            dockerfile: app.dockerfile
        working_dir: /var/www
        volumes:
            - ./:/var/www
        depends_on:
            - "database"
    # Web Server
    web:
        build:
            context: .
            dockerfile: web.dockerfile
        working_dir: /var/www
        volumes:
            - ./:/var/www
        depends_on:
            - "app"
        ports:
            - 80:80
    # Database
    database:
        image: mysql:8.0
        volumes:
            - dbdata:/var/lib/mysql
        environment:
            MYSQL_DATABASE: ${DB_DATABASE}
            MYSQL_ROOT_PASSWORD: ${DB_PASSWORD}
            MYSQL_PASSWORD: ${DB_PASSWORD}
            MYSQL_USER: ${DB_USERNAME}
        ports:
            - 33061:3306
    # Database management
    pma:
        image: phpmyadmin:5.1
        environment:
            - PMA_ARBITRARY=1
            - PMA_HOST=${DB_HOST}
            - PMA_USER=${DB_USERNAME}
            - PMA_PASSWORD=${DB_PASSWORD}
            - PMA_PORT=${DB_PORT}
        depends_on:
            - database
        ports:
            - 8888:80
    # Mailing Server
    mailhog:
        image: mailhog/mailhog
        logging:
            driver: 'none'
        ports:
            - 1025:1025
            - 8025:8025

volumes:
    dbdata:
¶ Step 5 — Creating our Dockerfiles
¶ Application Dockerfile
This is the image we’ll be mounting our code into. It will house our PHP-FPM processor and our application dependancies.
Dependencies may differ between projects and I think it’s important to highlight some of these nuances, so below you’ll find two app.dockerfile’s — one that uses GD image processor and another that uses the ImageMagick image processor. It’s up to you which you use, you may not have a choice.
Create an app.dockerfile and put either of the following snippets of code into it. You can use the same commands we used to create our docker-compose.yaml file to create your app.dockerfile.
Application utilising the GD image processor —
app.dockerfile
FROM php:8.0-fpm

RUN apt-get update && apt-get install -y  \
    libfreetype6-dev \
    libjpeg-dev \
    libpng-dev \
    libwebp-dev \
    --no-install-recommends \
    && docker-php-ext-configure gd --with-freetype --with-jpeg \
    && docker-php-ext-install pdo_mysql -j$(nproc) gd
Application utilising the ImageMagick image processor —
app.dockerfile
FROM php:8.0-fpm

RUN apt-get update && apt-get install -y  \
    libmagickwand-dev \
    --no-install-recommends \
    && pecl install imagick \
    && docker-php-ext-enable imagick \
    && docker-php-ext-install pdo_mysql
Breakdown
- php:8.0-fpm — We’re using an official php image as our base layer, running the latest version of PHP 8.0 with fpm dependencies pre-configured and the container exposed on port 9000.
- gd — Image processing library
- imagick — Image processing library
- pdo_mysql — Driver that enables access to MySQL databases from PHP via PHP Data Objects (PDO).
Just so it’s clear, you only need one of the above — I’ve kept both for completeness sake.
¶ Web Dockerfile
This image will host our Nginx web server and proxy php request through to our application layer.
First, we need to create a vhost.conf file to manage our Nginx server configuration. In your project directory create this file and copy in the following code —
vhost.conf
server {
    listen 80;
    index index.php index.html;
    root /var/www/public;

    location / {
        try_files $uri /index.php?$args;
    }

    location ~ \.php$ {
        fastcgi_split_path_info ^(.+\.php)(/.+)$;
        fastcgi_pass app:9000;
        fastcgi_index index.php;
        include fastcgi_params;
        fastcgi_param SCRIPT_FILENAME $document_root$fastcgi_script_name;
        fastcgi_param PATH_INFO $fastcgi_path_info;
    }
}
All this config is saying is…
- Our server will listen on port 80
- The index of our server is an index.php or index.html file
- Our servers root directory is /var/www/public.
- And finally, proxy php file requests to our app image php-fpm process listening on port 9000. Taking particular note of the
fastcgi_pass app:9000on line 12 — this is where we’re specifying our app service and port.
Second, we need to create a web.dockerfile for our web server image. Go ahead and create your web.dockerfile file, copying in the below code —
web.dockerfile
FROM nginx:1.21

COPY vhost.conf /etc/nginx/conf.d/default.conf

RUN ln -sf /dev/stdout /var/log/nginx/access.log \
    && ln -sf /dev/stderr /var/log/nginx/error.log
Breakdown
- nginx:1.21 — We’re using an official nginx image as our base layer, asking for version 1.21.
- We’re then copying our vhost.conf created earlier and overriding the default.conf Nginx provides.
- Following up with a symlink between Nginx output and our preferred log files — the same place you’ll want to look for your logs if anything goes wrong in your web server.
¶ Step 6 — Preparing your .env
Before you start any of your containers, we need to copy over the projects .env.example file to an identical .env file. You can do this by running mv .env.example .env in your project directory.
Then, inside your .env file, you want to update the following environment variables as follows —
DB_HOST=database
DB_PORT=3306
DB_DATABASE=laravel
DB_USERNAME=laravel-user
DB_PASSWORD=laravel-passwordMAIL\_HOST=mailhog
MAIL_PORT=1025
Remember earlier, when I said that Compose would read in our .env file variables? Some of these are the variables I was talking about. Compose will read these in to our docker-compose and substitute them for what we have here.
Moreover, you’ll notice that our host variables are direct references to our services we created in step 4. This is another neat feature of the Compose Tool. It knows to map these to the service IP addresses that we’ve referenced. It’s that simple.
¶ Step 7 — Starting your containers
Make your way into your project directory and run Compose’s up command:
docker-compose up
You’ll see your images begin to build and one by one they’ll come online.
Tying up loose ends
To wrap up your application config, you need to set the application key and clear any cached config files. We can achieve this by executing key:generate inside our applications docker container using docker-compose.
Run the following commands in your console/terminal —
docker-compose exec app php artisan key:generate
docker-compose exec app php artisan optimize
You might see a response much like if you’d ran it locally. What you’ve actually done by running these is execute each command inside your app container using Compose. Because we’ve mounted our code into our container, this will update both the containers code and the code local to your machine — no different than if you ran the command locally.
The main benefit of using Compose in this way, is that you don’t have to maintain any PHP version on your local machine. You can switch between projects without ever having to worry about it.
Time to check out your application!
In your browser, insert any of the following:
Application — http://localhost
PhpMyAdmin — http://localhost:8888

Mailhog — http://localhost:8025
¶ Wrapping up
From here, the world is your oyster. Kubernetes? Docker Swarm? World domination? Totally up to you.
If you’re not running a fresh install, don’t forget to npm install your javascript dependencies and to migrate and seed your database!
That aside, I hope this has been a helpful guide— drop a clap and let me know if it helped you out!
¶ Resources/Links
Source : https://medium.com/@chewysalmon/laravel-docker-development-setup-an-updated-guide-72842dfe8bdf
¶ Laravel 8+ repository including all docker files
- GitHub — A fresh Laravel 8+ project with a pre-configured setup for Docker
¶ All Docker related files
- Nginx Gist [GD] — All the files created in this guide (GD variant)
- Nginx Gist [Imagick]— All the files created in this guide (Imagick variant)
- Apache Gist [GD]— All the files for using Apache (GD variant)
- Apache Gist [Imagick]— All the files for using Apache (Imagick variant)
¶ DockerHub images used in this guide
- Nginx
- PHP
- MySql
- PhpMyAdmin
- Mailhog (unofficial)